🛈 As an Amazon Associate, CeraVelas earns from qualifying purchases. If you buy through our links, Amazon pays us a small commission at no extra cost to you. That’s how we keep the site running. How we choose.
📑 Contents
⚡ Our top picks: silicone candle molds
Stock checked on October 6, 2026

Best silicone candle molds in stock
Daisy Flower Silicone Candle Mold, Moldes para Velas for Candles, Handmade Soaps, Bath Bombs, Lotion Bars…
RESINWORLD Set of Large + Medium + Small 3D Skull Resin Molds, Flexible Clear Silicone Skull Head Molds…

4Oz Mold Release Spray for Candle Making and Epoxy Resin, Fast-Drying Silicone Oil Releaser, Non-Stick…
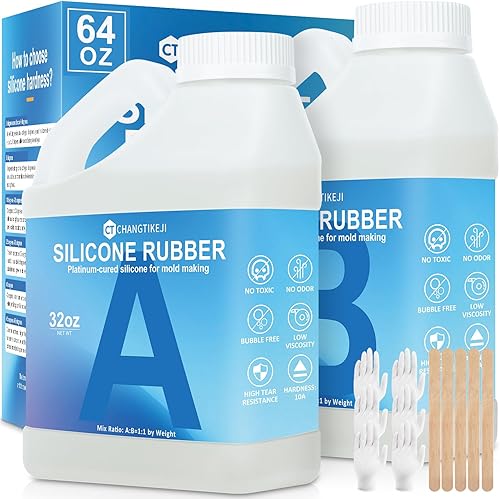
CHANGTIKEJI Silicone Mold Making Kit,64OZ Super Elastic Liquid Silicone for Mold Maker, Fast Cure Translucent…
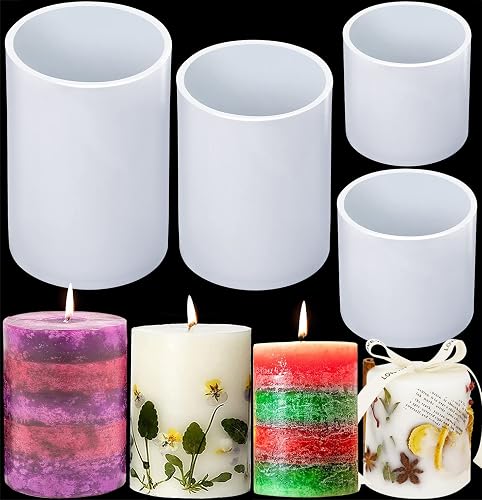
Candle Molds for Candle Making, 4Pcs Cylinder Silicone Mold

2 Pack Spiral Wave Resin Casting Molds - Silicone for 3D Animal Candle Making
See more silicone candle molds on Amazon →
CeraVelas score: combines the average rating and the number of customer reviews on Amazon.
What silicone candle molds are
A silicone candle mold is a flexible, heat-resistant form that you fill with melted wax to create a freestanding candle. Unlike a jar candle, the wax itself is the finished object, so the mold decides the shape, the surface finish and how much detail ends up on the candle. Classic smooth cylinders for pillar candles are the most common, but you will also find ribbed columns, spheres, bubble cubes, geometric shapes, figures and textured designs that would be almost impossible to release from a rigid mold.
Because silicone bends, you peel it away instead of pulling the candle out, so undercuts and sharp edges survive. If you are new to freestanding candles, read our pillar candle tutorial first, because the wax you choose matters just as much as the mold.
What to look for when buying
Many silicone molds sold online are designed for resin, soap or baking and are too thin or have no wick hole. Check these points:
- Wick hole or wick channel. Proper candle molds have a small hole in the base (which becomes the top of the candle) or a slit to thread the wick through. Without one, you will be poking holes yourself.
- Wall thickness. Thick, firm walls hold their shape when full of hot wax. Very thin molds bulge, and your pillar comes out oval or wavy.
- Heat rating. Look for a rating comfortably above your pour temperature. Platinum-cure silicone usually handles heat and repeated use better than cheap tin-cure molds.
- Finish inside the mold. Glossy interior surfaces give glossy candles; matte molds give a soft, frosted look.
- Stability. Tall or round molds tip easily. Some come with a support sleeve or a flat base; otherwise plan to stand them in a box or cup.
Common sizes and what they are good for
Wider candles need bigger or multiple wicks. Use our wick calculator once you know the diameter.
| Mold diameter | Typical height | Good for | Wick notes |
|---|---|---|---|
| 2 in (5 cm) | 2–4 in (5–10 cm) | Small pillars, gift candles, test pours | One small cotton wick |
| 2.75–3 in (7–7.5 cm) | 3–6 in (7.5–15 cm) | The classic home pillar | One medium wick sized for the wax |
| 3.5–4 in (9–10 cm) | 4–6 in (10–15 cm) | Chunky decorative pillars | Large single wick or two wicks |
| Shaped molds (spheres, cubes, figures) | Varies | Decor, gifts, eye-catching displays | Size for the widest point of the shape |
How to use and clean them
Pick a firm wax that shrinks a little and releases cleanly, such as pillar wax, a pillar-grade paraffin or beeswax. Soft container waxes, like most soy wax for jars, tend to stick and crack in molds. Thread a primed wick through the hole, seal the outside with a dab of putty or tape so wax cannot leak, and hold the wick centered at the top with a wick centering bar or a clothespin.
Melt your wax in a double boiler or melting pot, add color or fragrance within the supplier's range, and pour at the temperature recommended on the wax datasheet, typically somewhere around 70–85 °C (158–185 °F) for pillar blends. Pour slowly against the side to avoid air bubbles. As the candle cools, a sinkhole forms around the wick; poke relief holes and top it up with a second pour of slightly hotter wax.
Let the candle cool completely, ideally overnight, then peel the silicone back gently. A heat gun smooths small surface flaws. To clean, wipe out residue with a paper towel while the mold is still a little warm, then wash with warm soapy water and dry thoroughly. Never use sharp tools inside the mold. Store molds upright and unsquashed so they keep their shape.
Safety tips
- Never heat wax over direct flame. Use a double boiler or a dedicated melting pot and keep an eye on the thermometer.
- Stand molds on a heat-proof, level surface before pouring; a tipped mold full of hot wax can cause nasty burns.
- Do not exceed the fragrance load stated by your wax and fragrance supplier, and check the fragrance oil's flash point and safety data sheet.
- Keep molds you use for wax separate from food. Once a mold has had fragrance or dye in it, it should not go back in the kitchen.
- Always do a test burn of a new mold and wick combination, and never leave a burning candle unattended.
Common mistakes
- Using container wax. Soft jar waxes stick to the mold and leave a crumbly, pitted surface. Use a wax made for pillars.
- Pouring too hot. Very hot wax can shorten the life of your mold and causes deep sinkholes. Too cool, and you get jump lines and frosting marks.
- Demolding too soon. A candle that is still warm in the center can crack or deform. Patience pays off.
- Skipping the second pour. Without topping up, the base of the finished candle ends up uneven and hollow around the wick.
- Wrong wick for the diameter. A wick that is too small tunnels; too big and it drips down the sides. Check our guide to choosing wicks and do a test burn.
- Folding molds for storage. Creases and pressure marks transfer straight onto your next candle.
Pros and cons
👍 Pros
- ✓ Flexible, so candles release easily without mold release spray
- ✓ Captures fine detail and undercuts that rigid molds cannot
- ✓ Reusable many times with proper care
- ✓ Huge variety of shapes and sizes
- ✓ Easy to clean with warm soapy water
👎 Cons
- ✗ Thin, cheap molds bulge and give misshapen candles
- ✗ Soft container waxes stick and crack in them
- ✗ Tall and round molds need support to stay upright
- ✗ Silicone wears over time, especially if you pour very hot
How to use silicone candle molds, step by step
- Wash and dry the mold, especially before the first use.
- Thread a primed wick through the wick hole and seal the outside with putty or tape.
- Center the wick at the top with a centering bar or clothespin.
- Melt pillar wax in a double boiler or melting pot and add dye and fragrance within the supplier range.
- Pour slowly at the temperature on the wax datasheet, keeping a little wax for a second pour.
- Poke relief holes as the candle sets and top up the sinkhole.
- Let it cool completely, ideally overnight, then peel the mold away gently.
- Trim the wick, level the base and let the candle cure before the test burn.
Tips
- Stand round or tall molds in a cup or box filled with rice so they stay level.
- Warm the mold slightly before pouring to reduce jump lines and frosting.
- A glossy interior gives glossy candles, so choose the finish you actually want.
- Save leftover wax from the second pour for small test candles.
- Wipe out residue while the mold is still slightly warm; it comes off far more easily.
Projects with silicone candle molds

Related supplies
 🏛️ Waxes Pillar candle wax Pillar wax is a hard, high-melt blend made for freestanding candles that hold their shape without a container. See guide →
  🫘 Waxes Soy wax Soy wax is the go-to natural wax for container candles: creamy, beginner-friendly and known for a slow, clean burn. See guide →
  🎯 Wicks Wick centering devices A wick centering device holds the top of the wick while the wax cools, so it sets straight and right in the middle of the jar. See guide →
  🧵 Wicks Cotton candle wicks Pre-tabbed, pre-waxed cotton wicks are where almost every homemade candle starts: inexpensive, reliable and available in dozens of sizes. See guide →
  🔥 Tools Heat gun for candles A heat gun is the candle maker's eraser: a few seconds of hot air smooths bumpy tops, closes small holes and warms jars so the wax sticks properly. See guide →
  ✨ Dyes Mica powder Mica powder adds pearly shimmer and color to wax melts and candle surfaces. Just remember: it doesn’t dissolve in wax, so it shouldn’t go in the wax that burns around a wick. See guide →
 Frequently asked questions
Do I need mold release spray with silicone molds?
Usually not. Silicone releases wax on its own, especially pillar waxes that shrink as they cool. Release spray is more useful for rigid metal or plastic molds.
Can I use soy wax in silicone molds?
Use a soy blend made for pillars. Regular container soy wax is soft and sticky, so it often cracks or clings to the mold. Pillar wax, paraffin or beeswax work better.
Can I use the same mold for resin, soap and candles?
You can, but it is better to keep one set of molds for wax only. Resin and soap residues can affect the surface of your candles, and none of them should go back to food use.
How long do silicone candle molds last?
A good-quality mold can last for many pours. They wear faster if you pour very hot, use sharp tools inside them or store them folded.
Why does my candle have a hole in the middle?
Wax shrinks as it cools and forms a sinkhole around the wick. Poke relief holes while it sets and top it up with a second pour.