🛈 As an Amazon Associate, CeraVelas earns from qualifying purchases. If you buy through our links, Amazon pays us a small commission at no extra cost to you. That’s how we keep the site running. How we choose.
📑 Contents
⚡ Our top picks: wick centering devices
Stock checked on October 6, 2026

Best wick centering devices in stock
DINGPAI Candle Wick Holder, 20pcs Metal Candle Wick Centering Devices
DINGPAI Candle Wick Holder,60pcs Metal Candle Wick Centering Devices
20 pcs Metal Candle Wick Holders, Upgraded Candle Wick Centering Devices, Silver Stainless Steel Candle Wick…
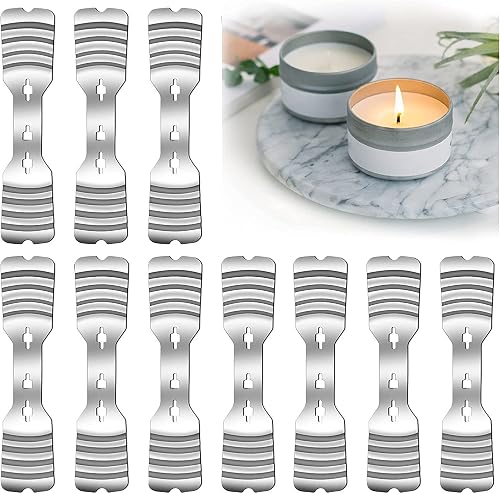
ABK10PCS Metal Candle Wick Holders, Wick Centering Tool for Candle Making

DINGPAI 25pcs Metal Candle Wick Holder, Candle Wick Centering Devices
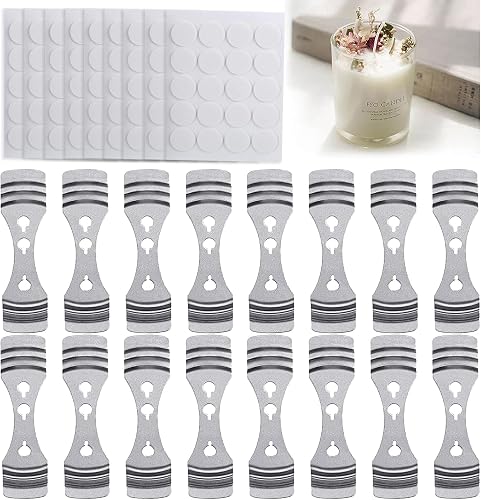
DINGPAI 20pcs Candle Wick Holder & 180 Stickers, Candle Making Supplies
See more wick centering devices on Amazon →
CeraVelas score: combines the average rating and the number of customer reviews on Amazon.
What a wick centering device is
When you pour wax, the wick wants to lean: the liquid pushes it, the wax shrinks as it cools, and any small bump knocks it off center. A centering device rests across the rim of the container and holds the wick from above so it stays upright and centered until the wax has fully set.
It sounds like a minor accessory, but it makes a real difference. An off-center wick creates an uneven melt pool, leaves unmelted wax on one side and can bring the flame too close to the glass, which then overheats. Paired with wick stickers, it’s the basic duo that keeps a wick exactly where it belongs.
Types of centering devices
- Slotted metal bar: the most common. A steel strip with a center slot that the wick slides into. Reusable and very stable.
- Bar with holes: several holes at different spacings, handy for centering in jars of different sizes.
- Two- or three-wick bar: holes spaced out for multi-wick candles in wide vessels.
- Clothespins or chopsticks: the classic DIY fix. It works, but it’s harder to get the wick perfectly centered.
- Wooden wick clips: hold a flat wood strip without bending it; very handy with wooden wicks.
| Type | Accuracy | Reusable | Best for |
|---|---|---|---|
| Slotted bar | High | Yes | Single-wick jar candles |
| Bar with holes | High | Yes | Jars of different diameters |
| Multi-wick bar | High | Yes | Wide vessels with 2–3 wicks |
| Clothespin or chopsticks | Medium | Yes | Tests and occasional use |
| Wood wick clip | High | Yes | Flat wooden wicks |
How to choose one
The key spec is length: the bar must be longer than the outside diameter of your container so it rests on both sides. A 4-inch (10 cm) bar covers almost every household jar; for wide bowls or concrete vessels, look for 6 inches (15 cm) or more. If you make multi-wick candles, choose a bar with the right spacing; the wick calculator tells you when two wicks make more sense than one.
If you pour pillar candles in silicone molds, there are also holders that sit on top of the mold and keep the wick taut while the wax cools.
How to use it
- Stick the wick tab to the center of the jar bottom.
- Thread the wick through the slot or hole and rest the bar across the rim.
- Pull the wick slightly taut and check from directly above that it’s centered.
- Pour the wax slowly without hitting the wick.
- Leave the device in place until the candle is completely solid, ideally several hours or overnight.
- Remove it, trim the wick and let the candle cure.
Common mistakes
- Removing it too soon. The top can look set while the inside is still liquid.
- Using a bar that’s too short. It falls into the jar or sits crooked.
- Not checking from above. From the side it looks centered; from the top it may be off.
- Pulling too hard. You can tear the tab off its sticker.
- Never cleaning it. Built-up dried wax makes it hard to slide in the next wick.
With a centering device and a good cotton wick, most crooked-wick problems simply go away.
Pros and cons
👍 Pros
- ✓ Straight, centered wicks with no fuss
- ✓ Reusable for years
- ✓ Inexpensive
- ✓ Make consistent batches easier
👎 Cons
- ✗ Need to stay on for several hours
- ✗ A short bar won’t work on wide vessels
- ✗ DIY clothespins are less precise
- ✗ Need cleaning now and then
How to use wick centering devices, step by step
- Stick the wick tab to the center of the bottom.
- Thread the wick through the device.
- Rest the bar across the rim.
- Check from above that it’s centered.
- Pour the wax without touching the wick.
- Remove the device once the candle is fully solid.
Tips
- Keep several on hand so they don’t slow down your batches.
- Clean off dried wax with hot water or a little heat.
- For narrow-mouth jars, use bars with holes instead of slots.
- A chopstick under the bar helps level it on uneven rims.
Projects with wick centering devices

Related supplies
 🧵 Wicks Cotton candle wicks Pre-tabbed, pre-waxed cotton wicks are where almost every homemade candle starts: inexpensive, reliable and available in dozens of sizes. See guide →
  🪵 Wicks Wooden wicks Wooden wicks give a candle a wide, low flame and that soft fireplace crackle. They look gorgeous, but they are pickier than cotton wicks. See guide →
  🏷️ Wicks Wick stickers Wick stickers are small double-sided adhesive dots that keep the wick tab stuck to the bottom of the jar while you pour your wax. See guide →
  🫙 Containers Glass candle jars Empty glass candle jars are the classic home for container candles: they show off the wax, hold heat evenly and, if you pick the right glass, stay safe from the first light to the last. See guide →
  🥫 Containers Candle tins Metal candle tins are light, unbreakable and perfect for travel candles, gifts and craft fairs. Pick seamless tins with a good lid and you can make clean, reliable candles in any size. See guide →
  🏛️ Waxes Pillar candle wax Pillar wax is a hard, high-melt blend made for freestanding candles that hold their shape without a container. See guide →
 Frequently asked questions
How long should I leave the wick centering device on?
Until the whole candle is solid, not just the surface. The safest bet is several hours or overnight.
Can I just use a clothespin?
Yes, it’s a classic trick and it works. It’s simply less precise than a slotted bar, so double-check from above.
What length do I need?
A bit longer than the outside diameter of the container. A 4-inch bar fits most household jars.
Do they work with wooden wicks?
Yes, but clips or bars with a wide slot that hold the strip without bending it are ideal.