🛈 As an Amazon Associate, CeraVelas earns from qualifying purchases. If you buy through our links, Amazon pays us a small commission at no extra cost to you. That’s how we keep the site running. How we choose.
📑 Contents
⚡ Our top picks: complete candle making kit
Stock checked on October 6, 2026


Best complete candle making kit in stock
Complete Candle Making Kits for Adults Beginners, DIY Candle Making Supplies Include Soy Wax,Wax M…
FUHITIM Soy Candle Wax Kit for Candle Making 10 lbs Bag

FUHITIM Soy Candle Wax Kit for Candle Making 5 lbs Bag, Premium Natural Soy Wax Flakes, No additives and…

Soy Wax Candle Making Kit Supplies With Wax Melter, Natural Candle Wax For Candle Making, DIY Art&Crafts Kit…
SUPERSUN Candles Making Kit for Adult - Christmas DIY Gift for Beginner, Includes Beeswax, Essential Oils…

FAIRYELF Candle Making Kit for Adults, Soy Wax & Wax Melter, DIY Candle Kit
See more complete candle making kit on Amazon →
CeraVelas score: combines the average rating and the number of customer reviews on Amazon.
What a candle making kit is
A candle making kit is a starter bundle that puts everything you need for a first batch in one box. A good one includes a natural wax (usually soy or a soy blend), pre-tabbed cotton wicks, a few fragrance oils, a pouring pitcher you can set in a double boiler, containers, wick stickers and some kind of wick centering tool. Better kits add a thermometer and dye chips.
The point of a kit is not that it is cheaper than buying piece by piece (sometimes it is, sometimes not), but that the parts are meant to work together. The wick size has, in theory, been matched to the jar diameter and the wax, the hardest part to get right as a beginner. If you want to understand the whole process before you buy, read our step-by-step candle making guide.
What to look for when buying
Kits vary enormously, from toy-like craft sets to genuinely useful starter packs. Check these points before you add one to your cart:
- The wax type and amount. Look for the wax named clearly (soy, coconut-soy, beeswax, paraffin) and the weight in pounds or grams. "Wax pellets" with no further detail is a red flag. Most beginners do best with container soy wax.
- A real pouring pitcher. A seamless aluminum or stainless steel pouring pitcher with a handle and spout is worth more than any amount of extras. Avoid kits that suggest melting wax in the microwave in a plastic cup.
- Wick sizes listed. Good kits tell you which wick series and size is included and what jar diameter it suits. If nothing is specified, plan to test.
- Fragrance quality. Fragrance oils should be made for candles and come with safety data. Tiny 0.3 oz (10 ml) vials are fine for a test, but you will need more for regular batches.
- A thermometer. If the kit does not include one, buy a candle thermometer separately. Pouring by guesswork is the most common cause of bad first candles.
- Clear instructions. Look for temperatures, fragrance percentages and cure times, not just "melt, add scent, pour".
Kit sizes and what is inside
Kits are usually sold in three tiers. This is what you can typically expect from each:
| Kit size | Typical contents | Makes roughly | Best for |
|---|---|---|---|
| Mini / gift kit | 1–2 lb (450–900 g) wax, 4–6 wicks, 2–3 fragrance vials, small tins | 4–6 small candles | Trying the hobby, gifting, a weekend activity |
| Starter kit | 2–4 lb (0.9–1.8 kg) wax, 10–20 wicks, pitcher, thermometer, 4–6 fragrances, jars or tins, dye | 8–15 candles | Beginners who want to learn properly |
| Deluxe kit | 5+ lb (2.3+ kg) wax, 50+ wicks, pitcher, thermometer, many fragrances, dye, wick holders, labels | 20+ candles | Committed hobbyists, small gift batches |
To check whether a kit's wax matches its containers, run the numbers through our wax calculator.
How to use it and clean up
Set up a clear, covered work surface away from children and pets. Weigh your wax rather than measuring by volume, place the pitcher in a pan of simmering water and melt slowly. Most soy blends are melted to around 80–85 °C (176–185 °F), fragrance is stirred in for a full two minutes at the temperature the supplier recommends, and the wax is poured somewhere around 55–65 °C (131–149 °F). Your kit's instructions or wax datasheet override these typical ranges.
Stick the wicks to the bottom of clean, dry containers before you start melting, and center them with the holder. After pouring, let the candles set undisturbed at room temperature, trim the wicks to about 1/4 inch (6 mm) and let them cure. Soy usually benefits from one to two weeks of cure before the scent throw peaks. Finally, do a test burn.
To clean the pitcher, pour any leftover wax into a silicone mold for later use, then wipe the still-warm pitcher with paper towels. Never pour wax down the drain.
Safety
- Always melt wax in a double boiler or a dedicated melter, never directly over a flame or burner.
- Never leave melting wax or a burning candle unattended.
- Do not exceed the maximum fragrance load on the fragrance oil or wax datasheet, and check the flash point before adding scent.
- Keep a lid or baking sheet nearby to smother a wax fire. Never use water on burning wax.
- If you plan to give or sell candles, follow the supplier's safety documents and add proper warning labels. Our candle safety guide covers the basics.
Common mistakes
- Skipping the test burn. Kit wicks are a starting point, not a guarantee. Burn one candle for 3–4 hours before making a batch.
- Adding all the fragrance in one go. More scent is not always stronger; past the wax's limit it seeps out and can burn poorly.
- Pouring too hot. This causes sinkholes, frosting and wet spots on the glass.
- Burning too soon. Give natural waxes time to cure.
- Using random household jars. Thin or decorative glass may crack. Stick to proper candle containers.
If your first candles tunnel or sink, our candle troubleshooting guide will help you fix the next batch.
Pros and cons
👍 Pros
- ✓ Everything in one box, so you can start the same day
- ✓ Wicks and containers are, in principle, matched to each other
- ✓ Usually includes a proper pouring pitcher you will keep using
- ✓ Lets you try several fragrances without buying full bottles
👎 Cons
- ✗ Quality varies a lot and contents are often vague
- ✗ Fragrance vials are small and run out quickly
- ✗ Cheaper kits leave out the thermometer
- ✗ Per pound, the wax is usually more expensive than buying in bulk
How to use complete candle making kit, step by step
- Read the kit instructions and check that every part is included.
- Wash and dry the containers, then fix the wicks to the bottom with wick stickers.
- Weigh the wax and melt it in the pitcher over a pan of simmering water.
- Check the temperature, add the fragrance at the recommended point and stir for two minutes.
- Let the wax cool to the pouring temperature and pour slowly into the containers.
- Center the wicks with the holder and let the candles set at room temperature.
- Trim the wicks to about 1/4 inch (6 mm), let them cure and do a test burn.
Tips
- Write down temperatures, fragrance percentage and wick size for every batch.
- Make one test candle before using all the wax.
- Warm the containers slightly to help the wax stick to the glass.
- Keep the pitcher only for wax, never for food.
- Buy more wax of the same type when you run out instead of mixing brands.
Related supplies
🌱 Kits Soy candle making kit A soy candle making kit is built around natural soy wax, cotton or wooden wicks and jars, so you can make clean-burning container candles at home with less guesswork. See guide →  🫕 Tools Candle pouring pitcher A candle pouring pitcher is the one tool every candle maker uses on every single batch: you melt the wax in it, stir in the fragrance and pour straight into your jars without a mess. See guide →
  🌡️ Tools Candle thermometer A candle thermometer takes the guesswork out of melting, adding fragrance and pouring, and it is the single biggest upgrade to the look and scent throw of your candles. See guide →
 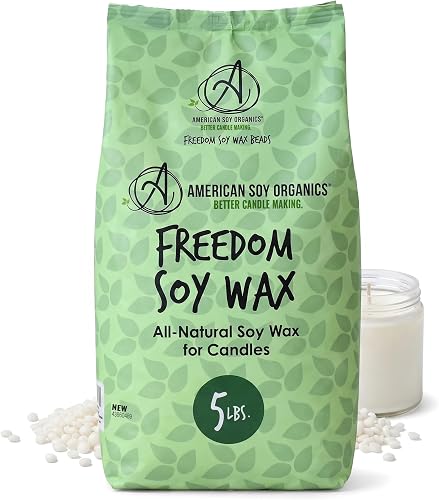 🫘 Waxes Soy wax Soy wax is the go-to natural wax for container candles: creamy, beginner-friendly and known for a slow, clean burn. See guide →
  🧵 Wicks Cotton candle wicks Pre-tabbed, pre-waxed cotton wicks are where almost every homemade candle starts: inexpensive, reliable and available in dozens of sizes. See guide →
  🌸 Fragrance oils Fragrance oils Candle fragrance oils are scent blends formulated to handle the heat of wax and fill a room with fragrance, both before and while the candle burns. See guide →
 Frequently asked questions
Is a candle making kit worth it for beginners?
Yes, if it includes a named wax, a real pouring pitcher and listed wick sizes. It saves you from buying mismatched supplies before you know what you like.
How many candles can I make with one kit?
It depends on the wax weight and container size. A typical starter kit with 2 lb (900 g) of wax makes around 6–8 candles of 8 oz each.
Do I need anything that is not in the kit?
Usually a pan for the double boiler, a kitchen scale and, if missing, a thermometer. Paper towels and a covered work surface help too.
How long do kit candles need to cure?
Soy and other natural waxes usually improve after one to two weeks. Always test burn before giving them away.
Can I reuse the kit pitcher?
Yes. Wipe it out while warm and keep it for wax only. A good pitcher lasts for years.