🛈 As an Amazon Associate, CeraVelas earns from qualifying purchases. If you buy through our links, Amazon pays us a small commission at no extra cost to you. That’s how we keep the site running. How we choose.
📑 Contents
⚡ Our top picks: wax melt making kit
Stock checked on October 6, 2026


Best wax melt making kit in stock
Complete Candle Making Kits for Adults Beginners, DIY Candle Making Supplies Include Soy Wax,Wax M…
Wax Melt Molds - 100 Pack Clear Plastic Clamshells for Wickless Candles
Wax Melting Pot Kit with Digital Scale(No Battery), Heat Gun, Thermometer
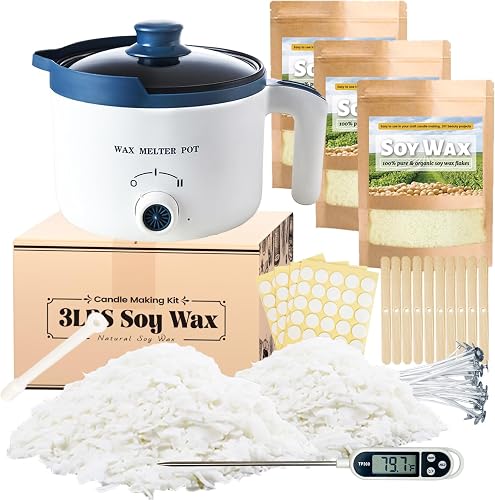
3lbs Soy Wax Melt Making Kit with Electric Wax Melting Pot

KQU Electric Wax Melting Pot for Candle Making with Thermometer 50oz
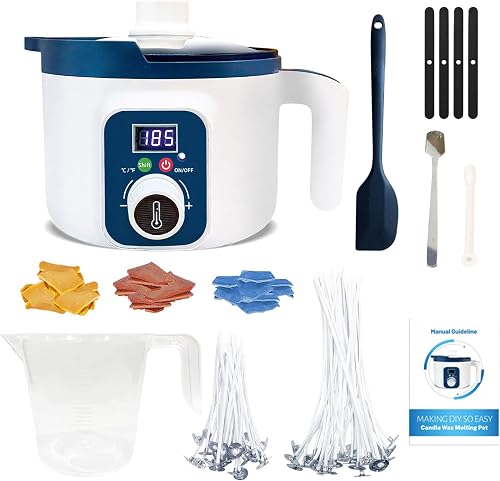
KQU Digital Wax Melting Pot with Temperature Control for Candle Making
See more wax melt making kit on Amazon →
CeraVelas score: combines the average rating and the number of customer reviews on Amazon.
What a wax melt kit is
Wax melts are small pieces of scented wax with no wick. You place one in a wax warmer, the gentle heat melts it and the fragrance fills the room. A wax melt kit contains everything you need to make them: a soft, highly fragrance-friendly wax, a few fragrance oils, color (dye chips, liquid dye or mica), silicone molds or clamshells and often a pouring pitcher.
Because there is no wick, melts are the most beginner-friendly project in candle making. You do not have to worry about tunneling, wick sizes or burn tests, so you can focus on scent blending and design. If you want to see the whole process, our wax melts tutorial walks you through it step by step.
What to look for when buying
- A wax made for melts. Look for a dedicated wax melt wax, often a soy or paraffin-soy blend. It should be firm enough to pop out of a mold cleanly but soft enough to release scent at low heat.
- Fragrance quantity. Melts are usually scented more heavily than candles, often in the 8–12% range depending on the wax. Make sure the kit includes enough oil for the wax provided.
- Molds or clamshells. Flexible silicone wax melt molds are reusable and great for shapes. Plastic clamshells are better if you plan to package and gift the melts.
- Candle-safe color. Dye chips, liquid candle dye or cosmetic-grade mica powder. Avoid food coloring or crayons, which do not mix properly with wax.
- A pouring pitcher. Even if it is small, a metal pitcher with a spout makes filling molds much cleaner.
- Clear instructions. Temperatures and fragrance percentages, not just "add scent".
Kit sizes and what is inside
| Kit size | Typical contents | Makes roughly | Best for |
|---|---|---|---|
| Mini kit | 8–16 oz (225–450 g) wax, 2–3 fragrances, 1–2 molds, a few colors | 15–30 cubes | Trying melts, kids' activity with adult supervision |
| Standard kit | 1–2 lb (450–900 g) wax, 4–6 fragrances, several molds, dyes or mica, pitcher | 30–60 cubes | Beginners, home use, small gifts |
| Gift / business starter kit | 2–4 lb (0.9–1.8 kg) wax, many fragrances, clamshells, labels, mica | 60+ cubes | Gift batches, testing a product idea |
Use our fragrance calculator to work out the exact amount of oil for the wax you are melting.
How to use it and clean up
Place your molds on a tray so you can move them without spilling. Weigh the wax and melt it gently in the pitcher over simmering water. Wax melt blends are commonly heated to about 75–85 °C (167–185 °F), but follow your wax's datasheet. Add color first and stir until it is completely dissolved, then remove from heat and add fragrance at the recommended temperature, stirring for about two minutes so it binds with the wax.
Let the wax cool a little and pour it into the molds. Add any top decorations, like a sprinkle of mica, while the surface is still soft. Leave the melts to harden fully, ideally overnight, before unmolding. Many melts smell even better after a few days of cure, wrapped or stored in an airtight container.
Wipe the warm pitcher with paper towels. Silicone molds can be cleaned with warm soapy water once any wax residue is removed; keep them for wax only.
Safety
- Always melt wax in a double boiler or melter, never directly over a flame.
- Check the fragrance oil's flash point and maximum usage rate before adding it.
- Wear gloves when handling undiluted fragrance oils and avoid skin contact.
- Finished melts can look like candy. Store and label them out of reach of children and pets.
- Use melts only in a warmer designed for them and never leave a tealight warmer unattended. See our candle safety guide.
Common mistakes
- Using too much fragrance. Oil that exceeds the wax's capacity sweats out and makes melts greasy.
- Adding fragrance to boiling-hot wax. Some of the scent can flash off and weaken the melts.
- Using the wrong colorant. Crayons and food coloring do not blend and can clog warmers.
- Unmolding too early. Soft melts break and lose their shape. Give them time.
- Not testing. Melt one cube in your warmer before making a big batch to check strength and color.
Pros and cons
👍 Pros
- ✓ No wicks, so no wick sizing or burn tests
- ✓ Very quick to make and set
- ✓ Lots of room for color and shape creativity
- ✓ Melts hold a strong scent in a small piece of wax
👎 Cons
- ✗ Needs a separate wax warmer to use
- ✗ Small fragrance amounts in many kits
- ✗ Melts can look like candy, so careful storage is needed
How to use wax melt making kit, step by step
- Set the molds on a tray and prepare your fragrance and color.
- Weigh the wax and melt it in a pitcher over simmering water.
- Add the color and stir until it fully dissolves.
- Remove from heat, add fragrance at the recommended temperature and stir for two minutes.
- Pour into the molds and decorate the tops if you like.
- Let the melts harden completely, ideally overnight, then unmold.
- Store in an airtight container and test one in your warmer.
Tips
- Weigh fragrance oils for consistent results.
- Start with a lighter color; you can always add more dye.
- Use clamshells if you plan to gift or sell the melts.
- Note every fragrance blend you make so you can repeat the good ones.
- Keep melts away from heat and sunlight to preserve color and scent.
Related supplies
 🧊 Molds Wax melt molds Wax melt molds turn scented wax into neat little cubes, shapes or snap bars ready for an electric or tealight warmer, with no wick needed. See guide →
  🧊 Waxes Wax melt wax Wax melt wax is made for wickless melts and tarts: firm enough to pop cleanly out of clamshells and able to carry a lot of fragrance oil. See guide →
  🌸 Fragrance oils Fragrance oils Candle fragrance oils are scent blends formulated to handle the heat of wax and fill a room with fragrance, both before and while the candle burns. See guide →
  ✨ Dyes Mica powder Mica powder adds pearly shimmer and color to wax melts and candle surfaces. Just remember: it doesn’t dissolve in wax, so it shouldn’t go in the wax that burns around a wick. See guide →
 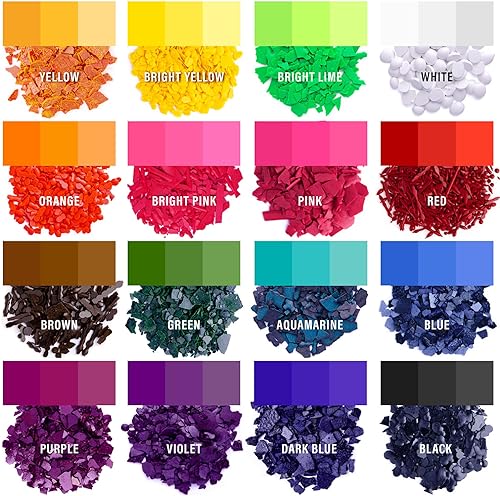 🎨 Dyes Candle dye chips Candle dye chips are concentrated oil-soluble colorants pressed into small chips: the easiest, cleanest way to color your wax. See guide →
  🫕 Tools Candle pouring pitcher A candle pouring pitcher is the one tool every candle maker uses on every single batch: you melt the wax in it, stir in the fragrance and pour straight into your jars without a mess. See guide →
 Frequently asked questions
Do I need a special wax for wax melts?
It helps. Melt waxes are formulated to hold more fragrance and release cleanly from molds. Container soy can work but may be softer.
How much fragrance should I use in wax melts?
Typically between 8 and 12%, depending on the wax. Always stay within the maximum on the wax and fragrance datasheets.
How long do homemade wax melts last?
Each cube usually scents a room for several hours. Stored airtight and out of sunlight, unused melts keep their scent for months.
Can I use candle molds for wax melts?
Yes, any silicone mold that is safe for wax works. Small cavities are best so each piece fits the warmer dish.