🛈 As an Amazon Associate, CeraVelas earns from qualifying purchases. If you buy through our links, Amazon pays us a small commission at no extra cost to you. That’s how we keep the site running. How we choose.
📑 Contents
⚡ Our top picks: candle pouring pitcher
Stock checked on October 6, 2026


Best candle pouring pitcher in stock
EricX Light Candle Making Pouring Pot, 4 pounds, Dripless Pouring Spout & Heat-resisting Handle Designed Wax…
Aroparc Candle Making Pouring Pot 101oz, Wax Melting Pot, Pouring Pitcher

EricX Light Candle Making Pouring Pot,2 pounds,Double Boiler Wax Melting Pot,Dripless Pouring Spout &…

DINGPAI Candle Making Pouring Pot, 44oz Double Boiler Wax Melting Pot
DINGPAI Candle Making Kit, Candle Make Pouring Pot and Wicks

DINGPAI Candle Making Supplies, Wax Melting Pot, DIY Candles Craft Tools
See more candle pouring pitcher on Amazon →
CeraVelas score: combines the average rating and the number of customer reviews on Amazon.
What a candle pouring pitcher is
A pouring pitcher (also sold as a pouring pot or melting pot) is a metal jug with a long handle and a shaped spout, designed to sit inside a pan of simmering water. The water acts as a double boiler: it keeps the wax from ever touching direct heat, so it melts gently and evenly instead of scorching or smoking. Once the wax is melted you add your fragrance oil, stir, and pour directly into molds or jars. The spout gives you a thin, controlled stream, which is exactly what you want when you are filling a narrow candle jar around a centered wick.
You can technically melt wax in an old saucepan, but a dedicated pitcher is cheap, easier to pour from and keeps wax residue out of your kitchen cookware. Most candle makers treat it as the first purchase after the wax itself.
What to look for when buying
- Material: seamless aluminum heats fast and is light; stainless steel is heavier, more durable and easier to clean. Both work well. Avoid enameled or coated pots that can chip.
- Seamless body: pitchers pressed from a single sheet have no welded seams where wax can leak or get trapped.
- Handle: a long handle that stays cool (or has a silicone grip) keeps your hand away from the steam. A second grip under the spout helps when the pot is full.
- Spout shape: a sharp, narrow spout gives a clean pour without drips running down the side.
- Volume markings: etched lines inside help you estimate how much wax you have melted, although you should always weigh it.
- Flat base: it should sit steadily in the water bath and on your work surface.
Common sizes
Pitchers are usually sold by the amount of wax they hold. Pick the size for the batches you actually make, not the biggest one available: a half-empty pitcher loses heat quickly and a heavy full one is harder to pour accurately.
| Capacity | Approx. wax per batch | Best for |
|---|---|---|
| 2 lb / about 1.2 qt | Up to 900 g (2 lb) | Beginners, test batches, 2–4 jars |
| 4 lb / about 2.5 qt | Up to 1.8 kg (4 lb) | The all-round size for 6–10 jars |
| Stainless 1.5–2 L | About 1–1.5 kg (2–3 lb) | Hobbyists who want a pot that lasts |
| Small 0.5–1 L | 200–500 g (7–18 oz) | Wax melts, tealights, color tests |
If you are unsure how much wax you need for a set of jars, run the numbers first with the wax calculator.
How to use and clean it
- Weigh your wax on a digital scale and put it in the pitcher.
- Place the pitcher in a saucepan with a few inches of water. Bring the water to a gentle simmer, not a rolling boil.
- Stir now and then and clip a candle thermometer to the side, or check with a probe. Most container waxes melt fully around 70–85 °C (158–185 °F); follow your wax supplier's datasheet.
- Take the pitcher out of the water, wipe the bottom so no water drips into your candle, and let it cool to the fragrance temperature on the datasheet.
- Add fragrance oil and stir slowly for about two minutes, then pour at the recommended pour temperature.
Cleaning: while the pot is still warm, wipe out leftover wax with paper towels. Hardened wax can be softened with a heat gun or by setting the empty pitcher back in hot water, then wiped. Never pour wax down the drain. If you switch between very different scents or colors, a final wipe with a little rubbing alcohol removes residue.
Safety
- Never put the pitcher on a burner or open flame on its own. Wax heated directly can overheat and ignite.
- Never leave melting wax unattended, and keep a metal lid or baking sheet nearby to smother a flame. Never use water on a wax fire.
- Do not let the water pan boil dry; top it up with hot water as needed.
- Keep wax below the fragrance oil's flash point when you add scent, and check the supplier's SDS for handling advice.
- Use pot holders: the handle can get hot even when it is labeled heat resistant.
Our candle safety guide covers the full workshop checklist.
Common mistakes
- Melting with no thermometer: guessing the temperature leads to frosting, poor scent throw and wet spots.
- Water dripping into the wax: even a few drops can cause sputtering wicks and pitting. Always dry the outside of the pot before pouring.
- Overfilling: leave at least an inch of space so you can stir without spilling.
- Using it for food afterward: once a pitcher has held wax and fragrance, keep it for candle making only.
- Pouring too fast: a quick dump traps air and shifts the wick. Pour in a slow, steady stream.
New to all this? Start with our step-by-step scented jar candle project.
Pros and cons
👍 Pros
- ✓ Keeps wax away from direct heat for a safer melt
- ✓ Narrow spout gives a controlled, drip-free pour
- ✓ Seamless aluminum or steel lasts for years
- ✓ Inexpensive compared with the time and mess it saves
- ✓ Keeps wax and fragrance out of your kitchen pots
👎 Cons
- ✗ Handles can get hot, so you still need pot holders
- ✗ Aluminum dents if dropped
- ✗ Large pitchers are heavy and harder to pour accurately when full
How to use candle pouring pitcher, step by step
- Weigh the wax and add it to the pitcher.
- Set the pitcher in a saucepan with a few inches of water.
- Heat the water to a gentle simmer and stir the wax as it melts.
- Check the temperature and melt fully per the wax datasheet.
- Lift the pitcher out and dry the bottom with a towel.
- Let it cool to the fragrance temperature, add the oil and stir for two minutes.
- Pour slowly into prepared jars or molds at the recommended pour temperature.
Tips
- Keep a dedicated pitcher for each wax type if you work with beeswax and soy, to avoid mixing.
- Put a folded towel under the water pan to stop the pot from rattling.
- Wipe the pitcher while it is still warm; hardened wax takes much longer to remove.
- Write your batch weight and temperatures on a notecard so you can repeat a good result.
- Do a test burn before you make a full batch with a new wax or scent.
Projects with candle pouring pitcher

Related supplies
 🌡️ Tools Candle thermometer A candle thermometer takes the guesswork out of melting, adding fragrance and pouring, and it is the single biggest upgrade to the look and scent throw of your candles. See guide →
 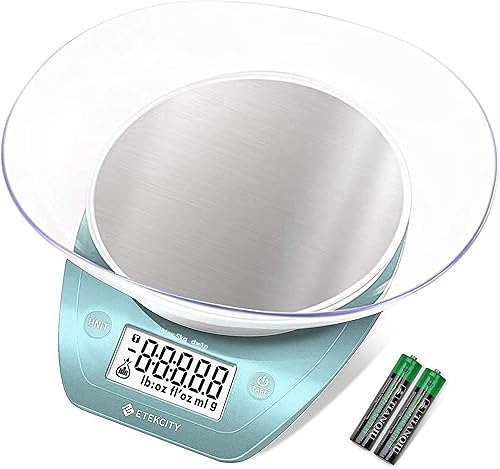 ⚖️ Tools Digital scale for candle making Candle making is done by weight, not by volume, so a simple digital scale is what turns a recipe into a candle you can repeat exactly. See guide →
  🫘 Waxes Soy wax Soy wax is the go-to natural wax for container candles: creamy, beginner-friendly and known for a slow, clean burn. See guide →
  🐝 Waxes Beeswax Beeswax is the original natural candle wax: it burns for hours with a golden flame and smells softly of honey even without added fragrance. See guide →
  🎁 Kits Complete candle making kit A complete candle making kit bundles wax, wicks, fragrance, a pouring pitcher and containers so you can make your first candles in an afternoon without hunting for a dozen separate supplies. See guide →
  🔥 Tools Heat gun for candles A heat gun is the candle maker's eraser: a few seconds of hot air smooths bumpy tops, closes small holes and warms jars so the wax sticks properly. See guide →
 Frequently asked questions
Can I heat a pouring pitcher directly on the stove?
No. Always use it as a double boiler inside a pan of water. Direct heat can overheat the wax past its flash point.
Is aluminum or stainless steel better?
Both work. Aluminum is lighter and heats faster; stainless steel is sturdier, easier to clean and less likely to dent.
What size pitcher should a beginner buy?
A 2 lb or 4 lb pitcher covers most home batches. The 4 lb size is the most versatile if you plan to make several jars at once.
How do I clean wax out of the pitcher?
Wipe it with paper towels while warm. For hardened wax, warm the empty pitcher in hot water or with a heat gun, then wipe again.
Can I use the pitcher for cooking afterward?
It is best not to. Fragrance oils and dyes leave residue, so keep it as a candle-making tool only.